Hello everyone. Today I want to introduce you to a very well known advertising network which is a great alternative to those who are already making money on their websites but want to earn more. Infolinks is a contextual advertising network working with thousands of publishers and more than 100,000 active websites around the world distributed in 128 countries. Here’s our Infolinks Review.
Infolinks has been recommended in my list of the best alternatives to Adsense for 6 years already, but they are actually bigger than that. You can use Infolinks at the same time with Adsense ads without having problems or being banned as it could happen with other networks. And you can mix it with many other networks from that list too to increase your revenue.

As mentioned, Infolinks has contextual ads and they’ve been online for a few years already. They have close relationships with different publishers and of course, they work with several big advertisers including some of the biggest ones around the globe. eBay, Pizza Hut and HP are just a few. That means they have a big inventory of ads waiting to be shown on your website with good CPCs and payouts. Here are a few others you might be able to promote on your website depending on the niche.

Table of Contents
Infolinks Review
The best way to explain how contextual advertising is by looking at the video below:
Infolinks Ads
As you can see, there are several Infolinks ads formats, both for desktop and mobile traffic to improve your earnings no matter what. Infolinks does a great work scanning your website so they can show the best ads based on your keywords, which is somewhat similar to what Adsense does, but I feel the algorithm here has been improved and so you’ll get better results with very high click rates (CTR) without being too intrusive with your ads or pop-ups as other networks do.

I’m going to go over on how to set up each one of those Infolinks ads later, but here’s a video explaining how each type of contextual ads works with Infolinks:
https://www.youtube.com/watch?v=Chdx_zzFPk4
Infolinks Dashboard
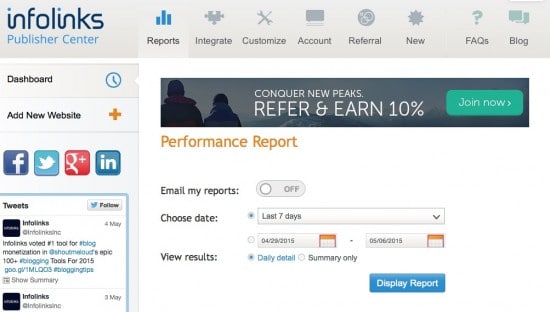
OK! No more videos, I promise. Let’s get our hands dirty and get a sneak peek at their Dashboard. Sign up as a publisher here to get started. The user interface looks amazing and if you’ve been working with several ad networks before, you’ll definitely appreciate it. When you first log in you’ll see your last 7 day reports. Here you can check your impressions, clicks, and earnings. Also, you have an option to email yourself the reports in case you can’t access to their portal when you’re out without a computer.
While writing this Infolinks review I also noticed they have an app for Android and iOS users where you can check your earnings in real-time. Not every network does that and it’s always something good to have. 🙂
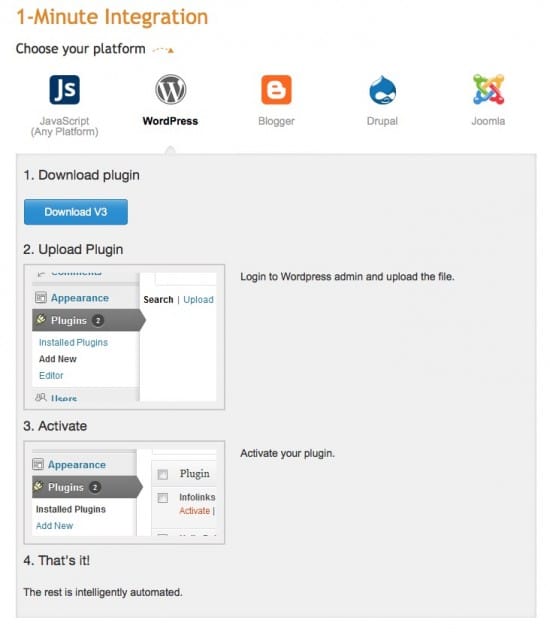
If you want to get started with Infolinks as soon as possible there’s a 1-minute integration menu where you can add their code to any platform with a javascript code, but they’ve gone the extra milestone by adding quick settings in case you use any popular CMS including Wordpress, Blogger, Drupal or Joomla.
Installing Infolinks in your Wordpress website is as simple as downloading a plugin and link it with your account. No need to add javascript or extra plugins in your HTML/PHP code, which is great in case you’re not a tech-savvy person.
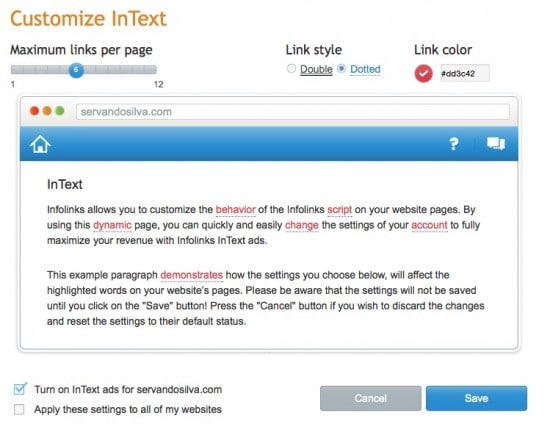
Now that you know how easy it is to start using Infolinks, let’s get a quick look at the customization options for every type of ad they provide. We’ll start with their Intext ads as those are the ones that changed the way Infolinks do advertising. Infolinks will create links from your articles by scanning the keywords you’re using, thus resulting in very interesting ads that are non-intrusive and have a high engagement rate. In their InText manager you can select how many links you want per page (1-12), the style of the links, and even the color to match it with your website’s design.
After you’ve done the proper customization you can either deploy those settings to 1 website or to all the websites you have at the same time. You just need to add your websites to the dashboard to make it work.
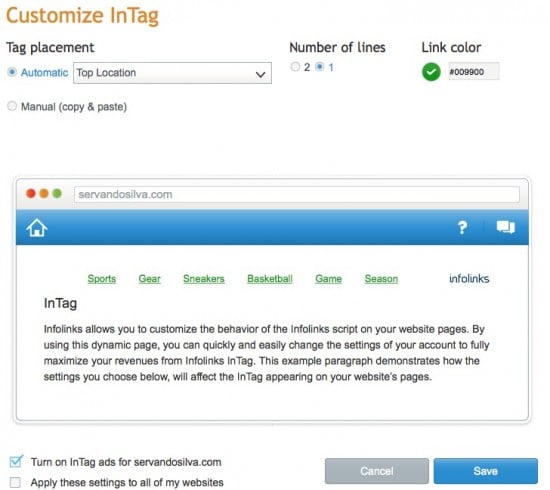
Then we have InTag ads, which are pretty much in the same category as the InText ads. InTag ads also appear as keywords, but instead of making links appear on your articles, there will be a tag cloud with related terms. This is very similar to the ads with Google Adsense and you can customize the number of lines, the color, and the location of the tag cloud (top, bottom, or both). Below you’ll see an image of how InTag ads look like:
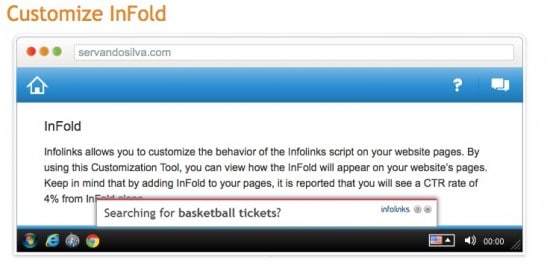
Let’s move to InFold ads. These are one of the best alternatives in case you don’t want your text to become links, but you still want contextual ads with high engagement on your website. InFold ads are shown at the bottom of the browser and they look fantastic in both mobile and desktop traffic. I should add that Infolinks Ads are usually shown in the same window and they have a back button so your audience goes back to your website for more content in case they aren’t interested in the advertised product/service after all.
You can also customize the color of the InFold ads and they have a close button in case your readers don’t want to see them.
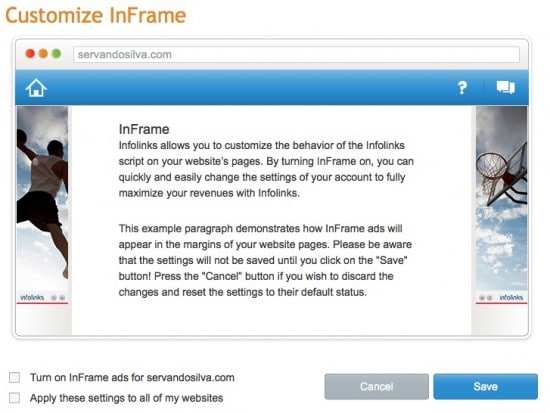
Next we have InFrame Ads. This is a very interesting alternative you can’t see in other networks. InFrame ads take over all of your website blank space and fill it up with contextual ads. You end up with a very nice looking website that doesn’t show banner ads inside the content/sidebar and of course, you can customize the ads the same way I explained before.
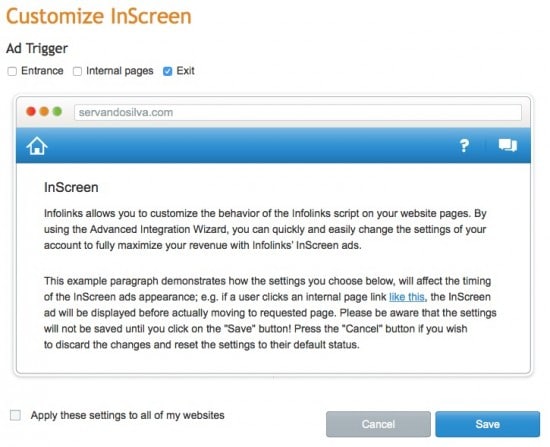
Finally, they have InScreen ads. These are more intrusive ads and are also well known in the Industry as interstitial ads. InScreen ads cover up like 90% of your screen real state in order to get the best engagement and CTR. I’ve seen this work wonderful with mobile traffic, but not so much with desktop traffic as it might be a little intrusive for your readers. It’s always a matter of test, so test everything and see which ads work better for your niche. The image below doesn’t reflect how the InScreen ads are shown, but you can check them in the second video posted above.
What you can customize here is the time where the InScreen ad is shown. You can either decide to fire the InScreen ad when your traffic arrives to your website, when visiting internal pages (homepage stays clean) or only when the visitors are trying to leave your website. I’d use this last option as it works a lot for many pop-ups and interstitial ads with other networks (e.g. RevenueHits and Adsterra).
Infolinks Review – Earnings and Payments
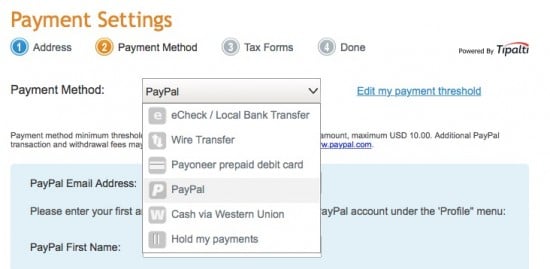
Infolinks use pretty much every payment method to withdraw your earnings without problems no matter where you’re located at. Your Infolinks earnings can be processed via eCheck, Wire transfers, Payoneer, Paypal, and even Western Union.
The payments are processed 45 days after the end of the month, which means what you earn in April will be paid in the middle of June. Their payment threshold is $100 for Wires and Western Union and $50 for everything else.
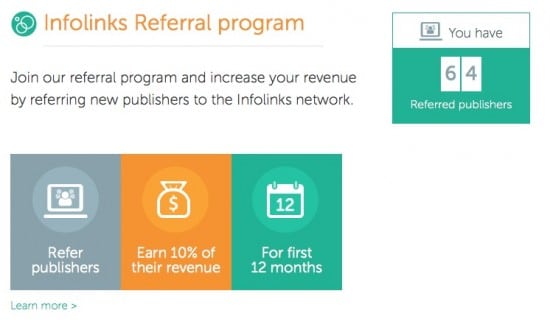
Finally, I’d like to add that Infolinks has just launched their Referral program in April 2015 and while I’ve been recommending them blindly for 3 years, they now pay 10% of your referrals revenue during the first 12 months. I just started using their referral program and I’ve got 64 publishers already. You can check your referral stats right in the dashboard with a clean user interface too. 😉
Conclusions
That’s all for my Infolinks Review today. Honestly, Infolinks has been doing great lately and their platform has changed a lot since the first time I checked them back in 2012. I think they are a great alternative for people who want to use non-intrusive ads, or even if you’ve got an Adsense account you can still add Infolinks and get some extra revenue from your traffic.
Their user interface is great and their ads are very easy to implement and customize. Their InText ads are great if you hate banners or pop-ups but try the InFold ads too as they’ve been working great for many publishers.
Sign up here for a publisher’s account and I’ll talk to you in the next one!


